Morning kids!!!
Now we are going to learn how to make
a Corner Bookmark Monster! They are super easy to make, look fun, and are super quirky.

Steps
First, watch the video.
Next, prepare the materials you need:
- A square piece of white paper -15x15 cm- (Just plain old printer paper)
- Coloured paper.
- Coloring Pens.
- Scissors.
- Glue Stick.
If the video instructions are not for you, here is how to make this easy paper bookmark following step by step photo instructions!
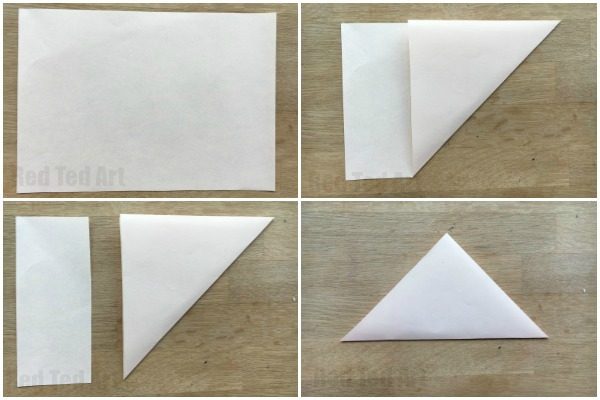
- Take your A5 sheet of paper and fold over one corner to create a triangle.
- Cut off the excess and rotate your triangle so the long edge is at the bottom and the right angle faces up.
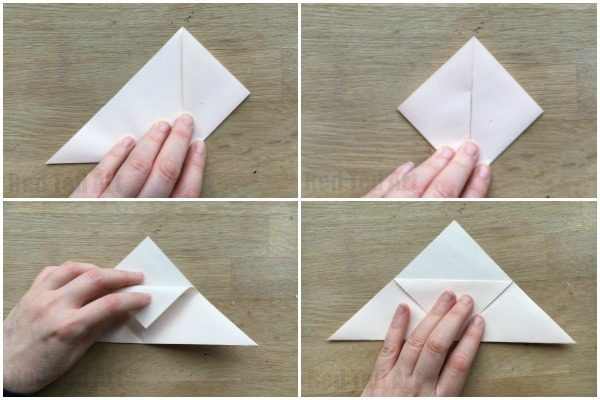
- Fold the lower right corner up to meet the top right-angled corner.
- Repeat for the left side.
- Fold these two back open.
- Flip down ONE of the top sheets and crease.

Final steps.
- Now fold the flaps you created back up and tuck INTO your bookmark.
- Repeat for the other side
- Congratulations, you have just created your basic Origami Corner Bookmark!
No hay comentarios:
Publicar un comentario
Nota: solo los miembros de este blog pueden publicar comentarios.